Create Job Sheet For Every Repaire
Last Updated: 30 December 2024
Managing a repair shop effectively involves juggling multiple tasks: tracking repair jobs, managing employees, overseeing inventory, and processing payments. Without the right tools, these responsibilities can quickly become overwhelming, resulting in operational inefficiencies and dissatisfied customers.
That’s where our repair management software becomes invaluable. Designed specifically for repair shops, our software offers a comprehensive suite of features, including job sheet creation, employee tracking, inventory management, and POS (Point-of-Sale) integration . Whether you run a mobile repair shop, electronics service center, or auto repair business, our system is your key to streamlining workflows, reducing errors, and boosting customer satisfaction.
One of the most critical features of our software is the repair sheet—a powerful tool that enables shop owners to organize and document repair tasks with precision. A well-structured repair sheet fosters transparency, ensures accountability, and allows you to track all repairs efficiently from initiation to completion.
In this blog, we’ll provide a step-by-step guide to creating a repair sheet using our software. Follow these steps to ensure every repair job is properly documented, enhancing your business’s efficiency and building trust with your customers.
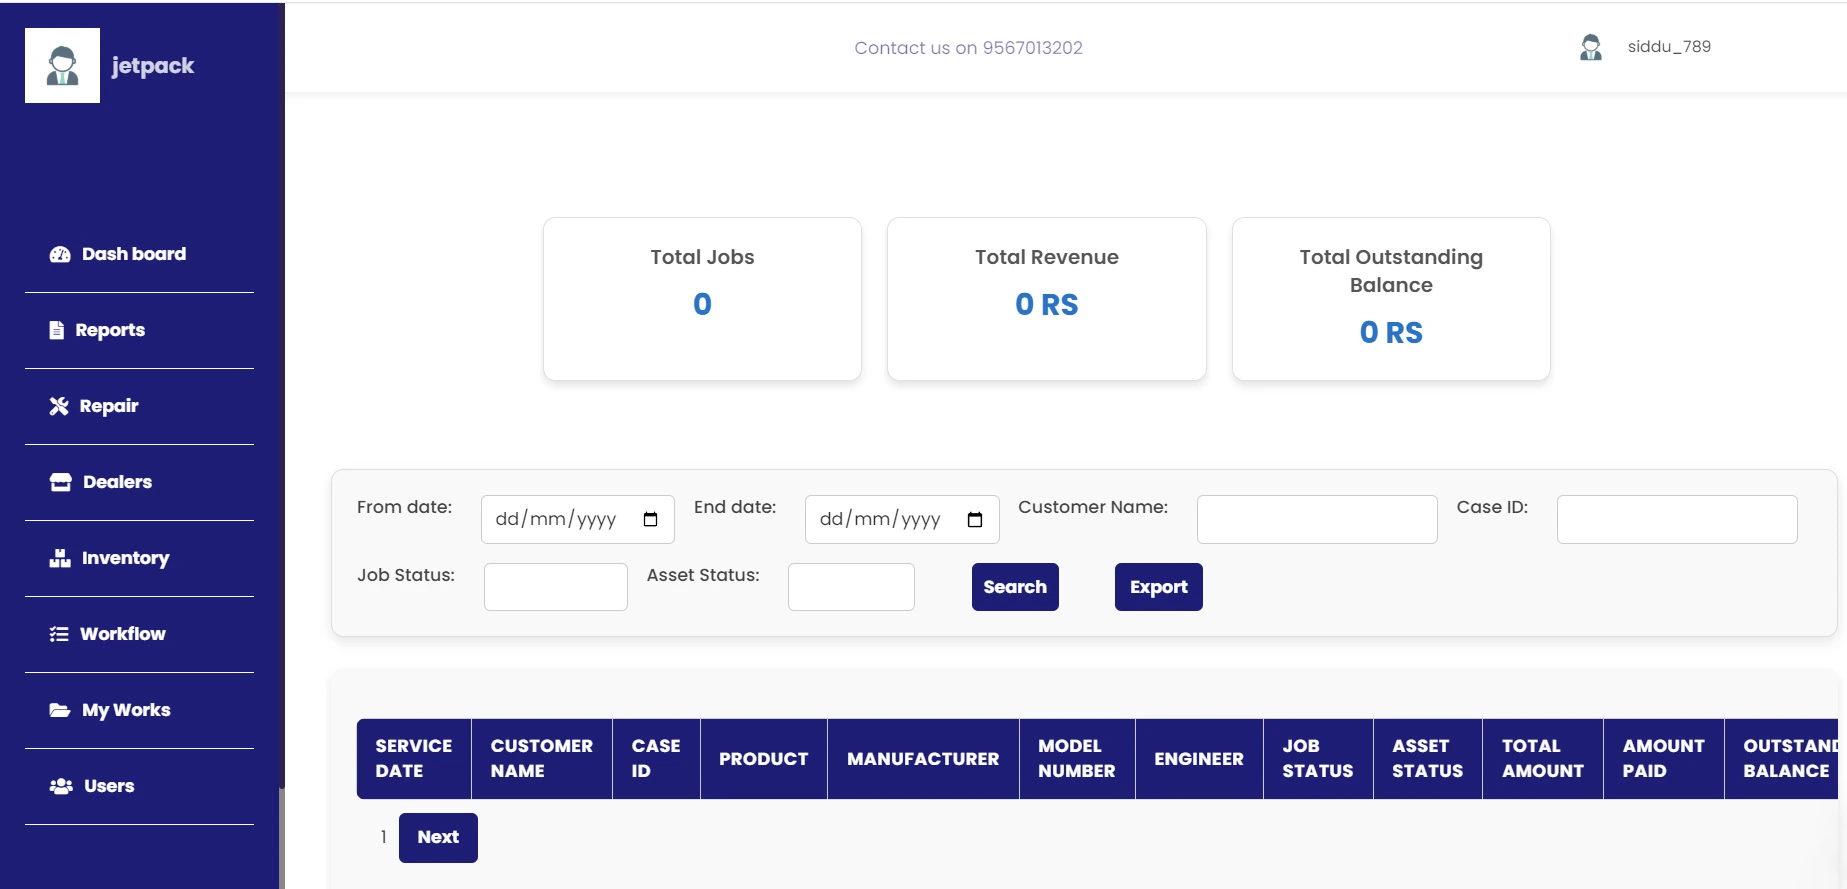
Step 1: Start by navigating to the homepage of the software. Locate and click on the “Repair” button in the Left menu to access the repairsheet section. This is the starting point for creating a new repair sheet.
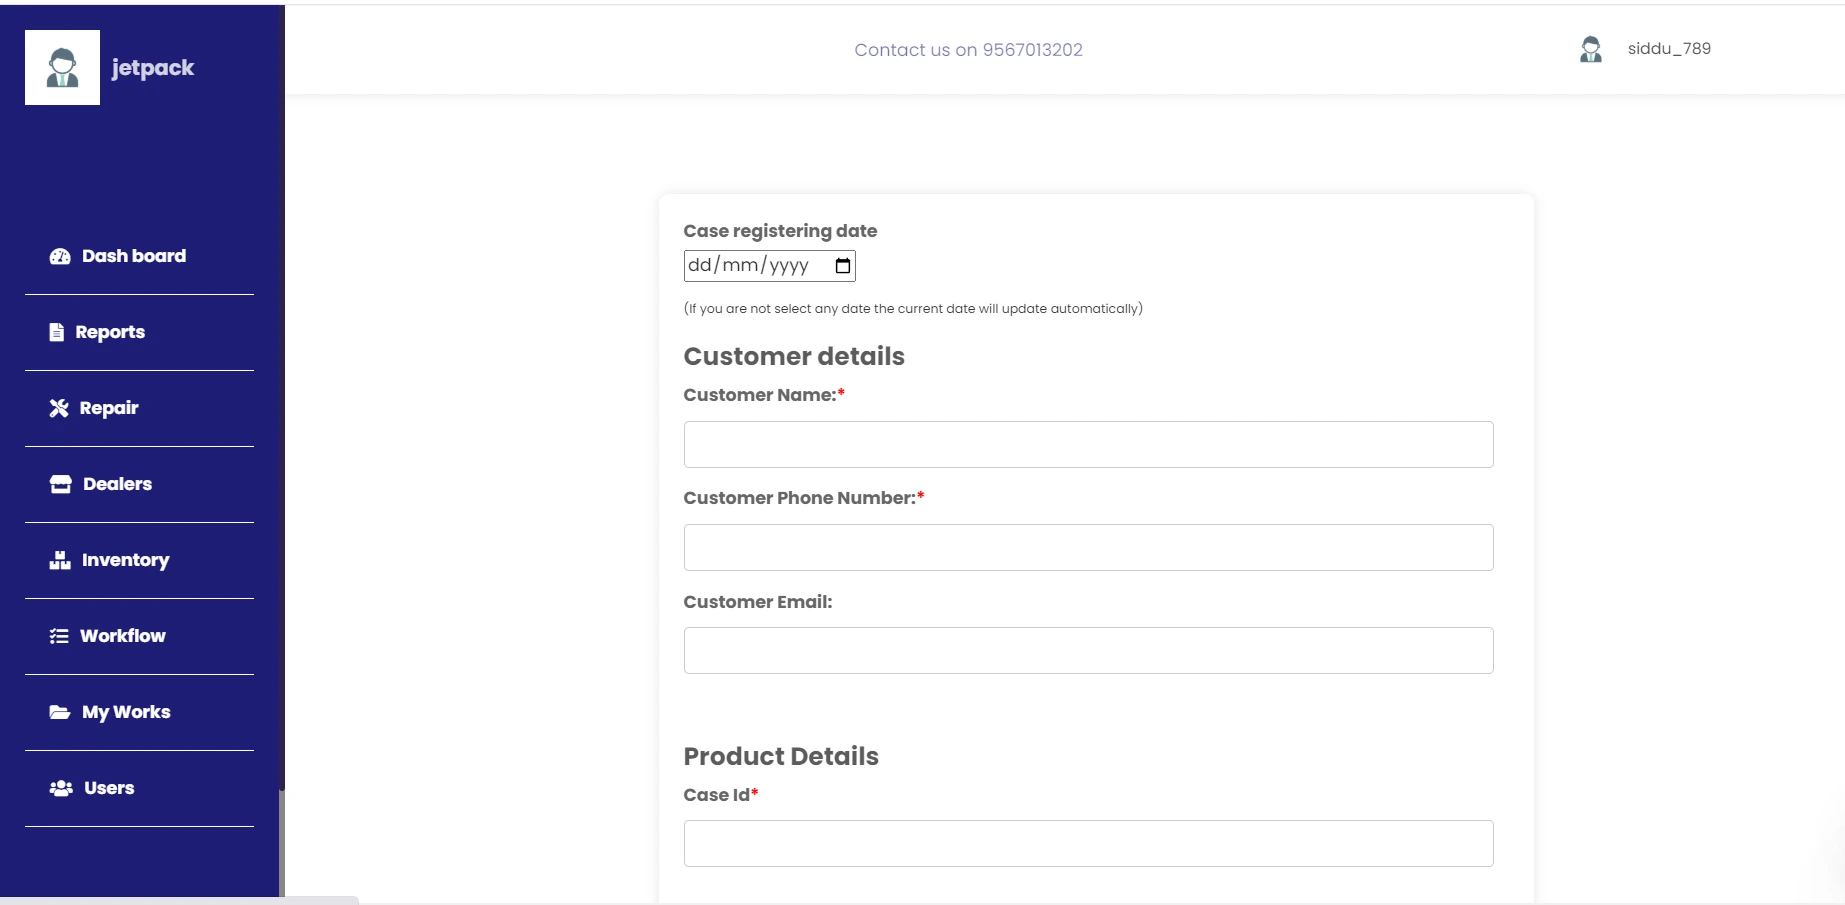
Step 2: Once inside the repair section, you’ll find a form where you can input all necessary details about the repair job. These include:
Customer Information: Name, contact details, and address.
Device or Item Details: Model, serial number, issue description, and any additional notes.
Service Type: Diagnostics, repair, maintenance, or replacement.
It’s crucial to complete all mandatory fields marked with a red asterisk (*) to ensure the repair can be processed smoothly. Accurate information at this stage reduces the risk of errors and improves job tracking.
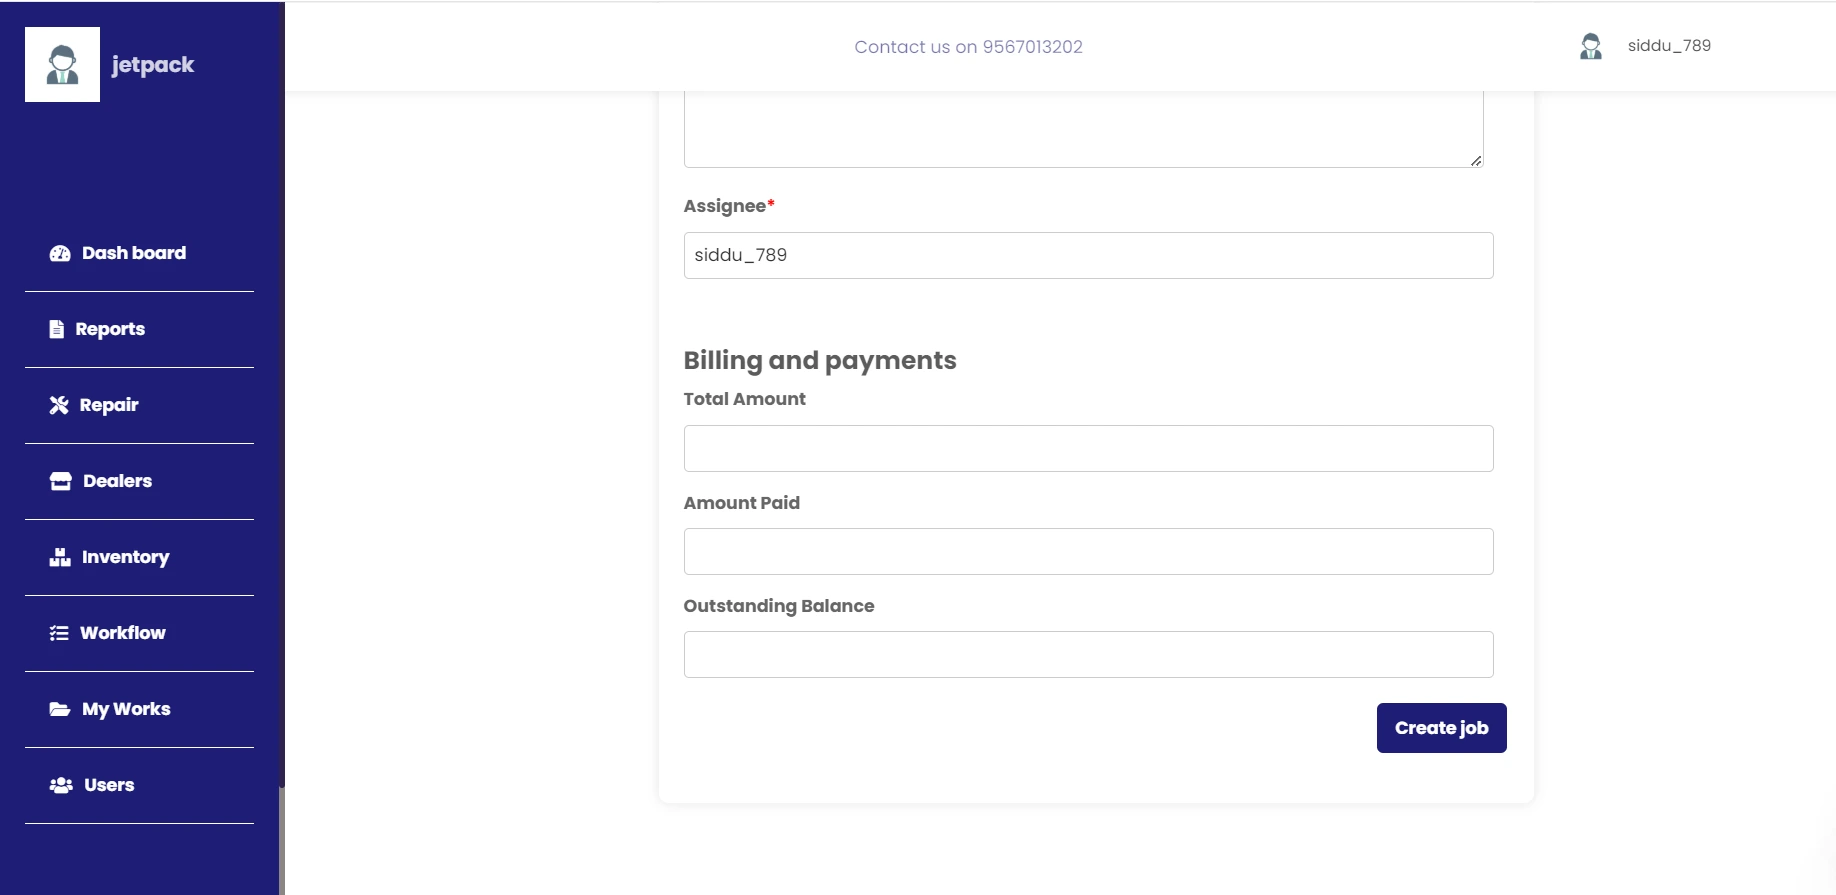
Step 3: After entering the required details, click the “Create Job” button. This action will save the information in the system and generate a new repair sheet.
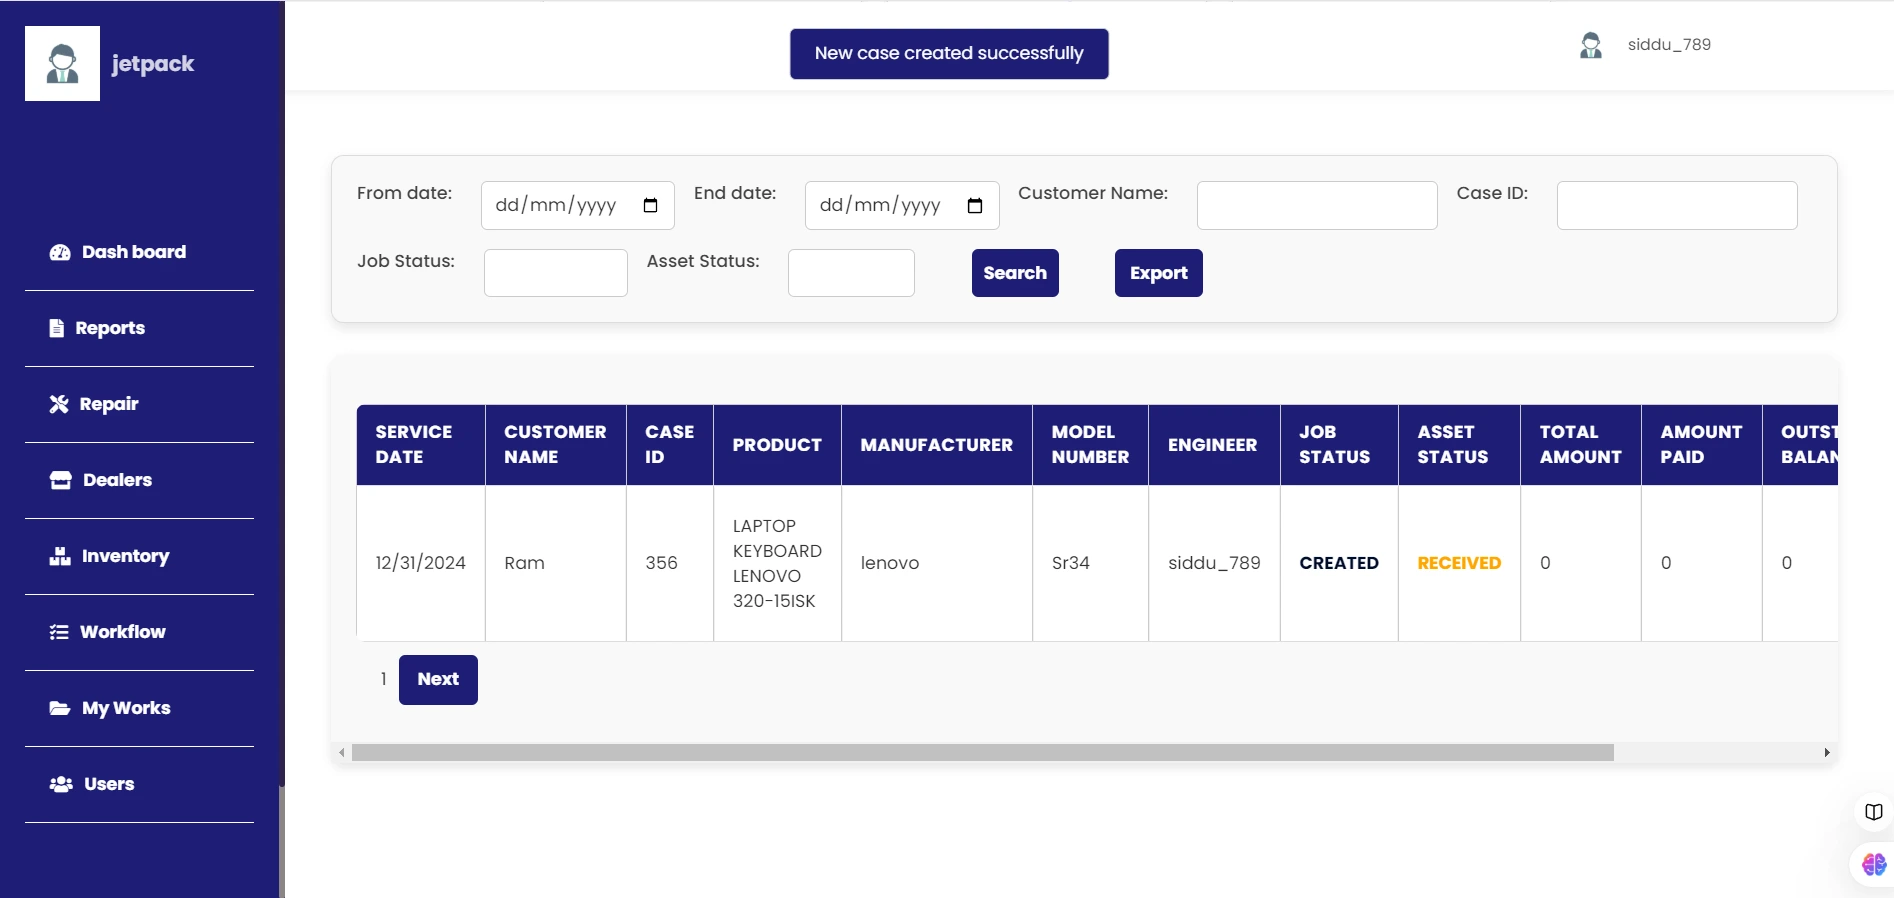
Step 4: To confirm the successful creation of the repair sheet, navigate to the Dashboard. Here, you can view a comprehensive list of all active repair jobs, including the one you just created. Review the job details to ensure everything is recorded correctly and up to date.
Enhance Repair Efficiency Now
In today's competitive market, managing repair tasks efficiently is not just an option—it's a necessity. By leveraging our repair management software, you can simplify complex workflows, reduce errors, and deliver exceptional service to your customers. From creating detailed repair sheets to tracking inventory and managing employees, our system is designed to help repair shops operate at peak performance.
Take the first step toward streamlined operations and enhanced customer satisfaction. Start using our software today and experience the difference it makes in transforming your repair business into a well-oiled machine. Efficiency, transparency, and accountability are just a click away!
 +91 91 7551-0132028